TaleSpire Dev Daily 9
I like these days. These days I get to give good news. And today’s news is that the constrained flood fill works!
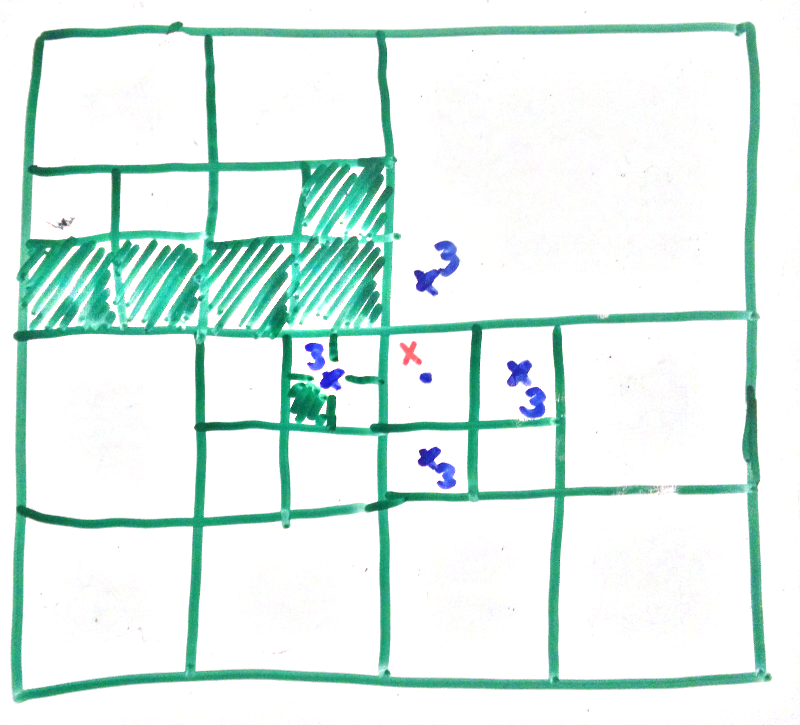
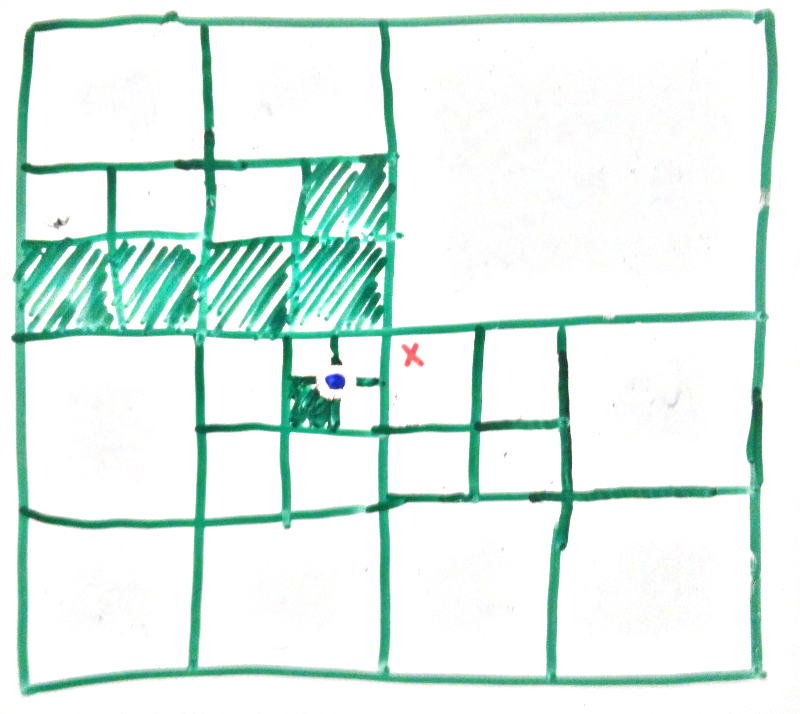
Let’s start with the pictures. In the next picture the white areas are all the fog of war we want to reveal if the character was at the red crosses. We can see that it hasn’t flowed into the blocked off room (even though the search does work vertically) as we have told it not to search above the eyeline of the character.
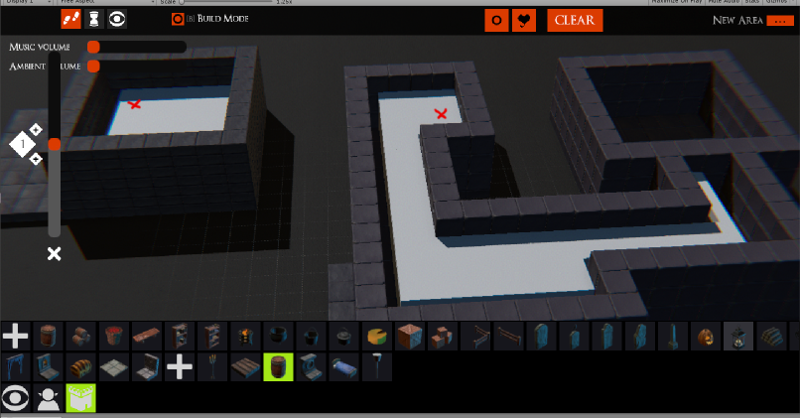
We can see this more clearly for this scene

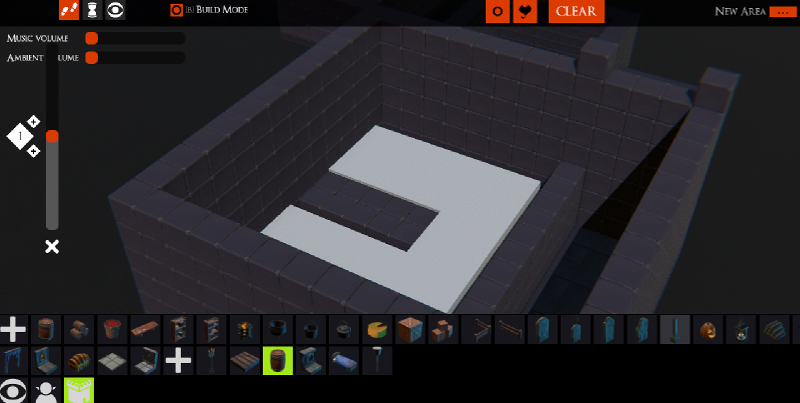
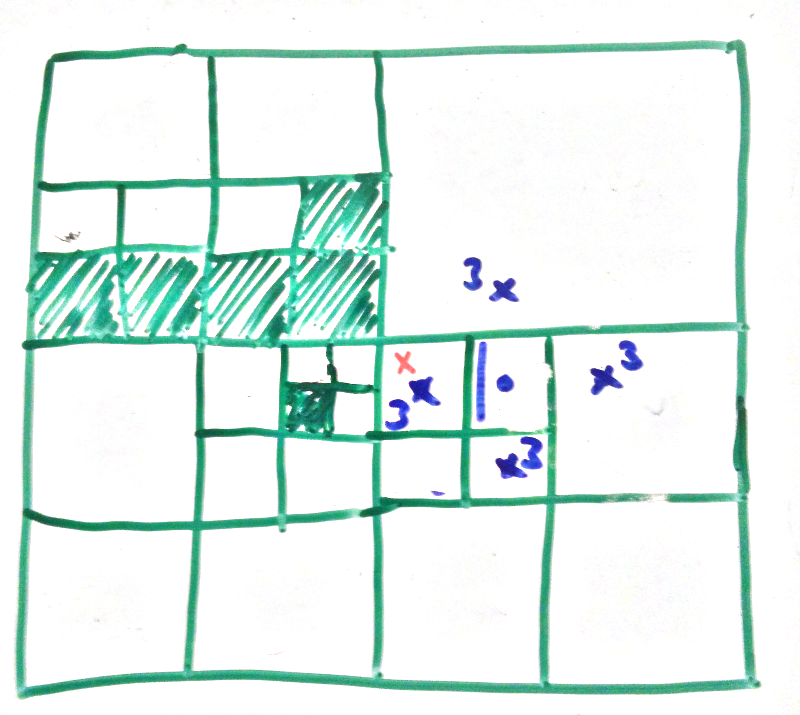
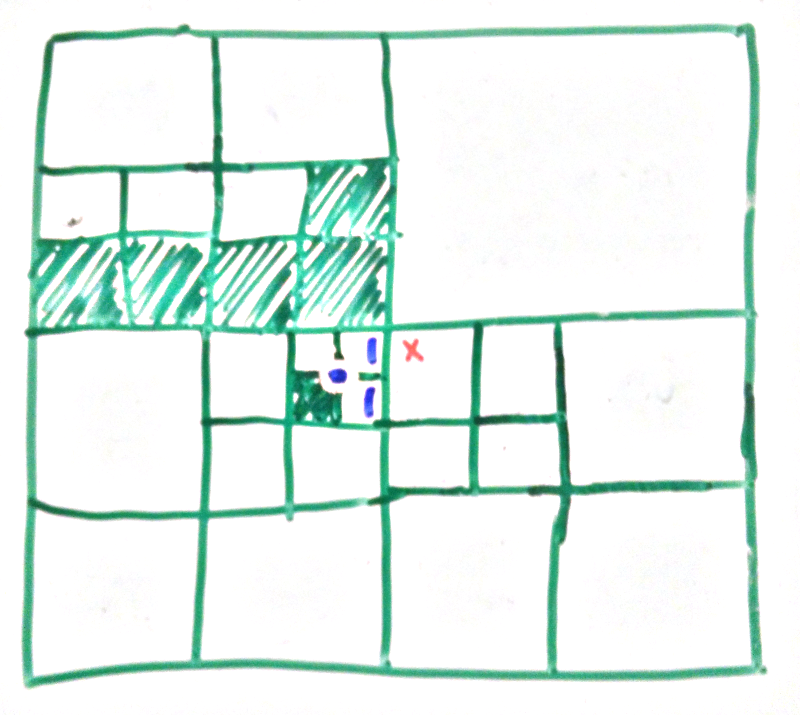
If we search from the green cross we get
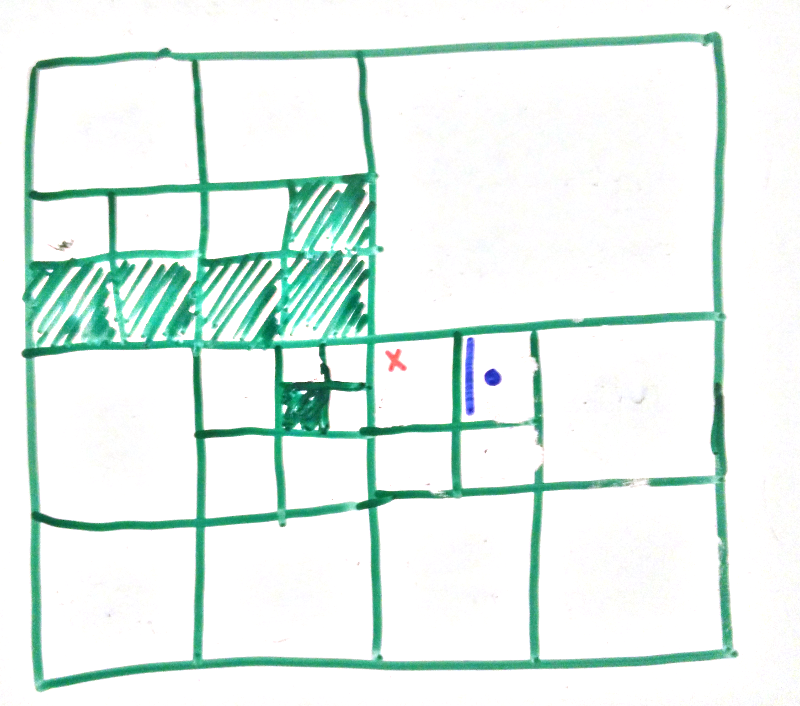
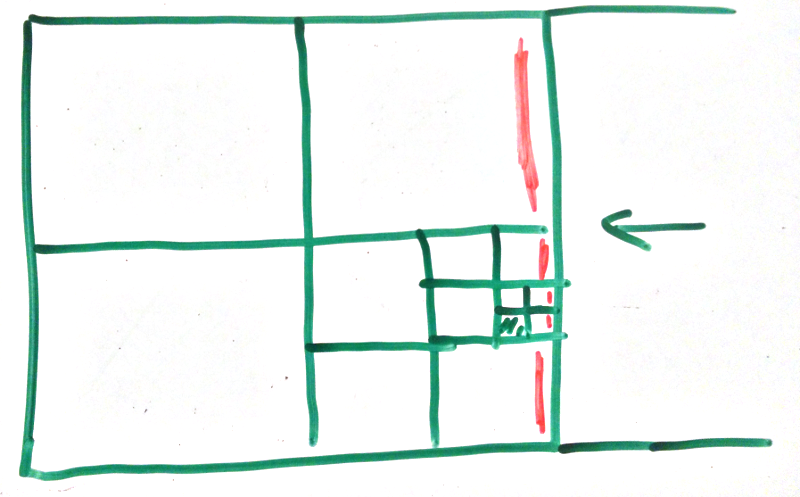
And from the red cross we get
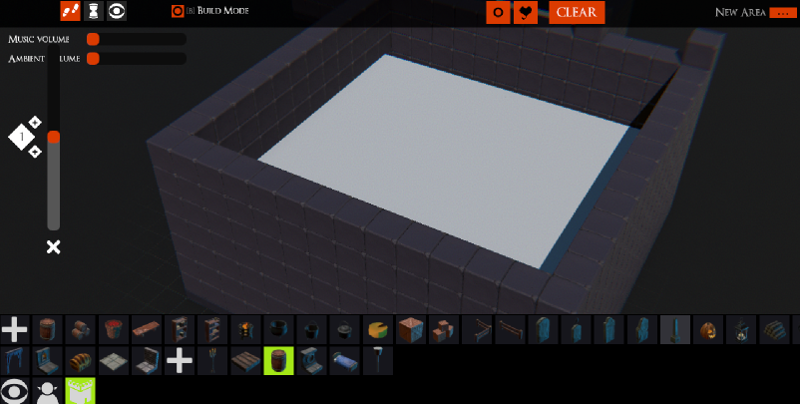
This satisfies the requirements we had so hooray!
My (albeit brief) googlings didn’t give me a guide to how to do flood fill on an octree so here is my approach. We are going to do it on quadtrees as that makes the diagrams simpler, but the extensions to 3d in this case are trivial.
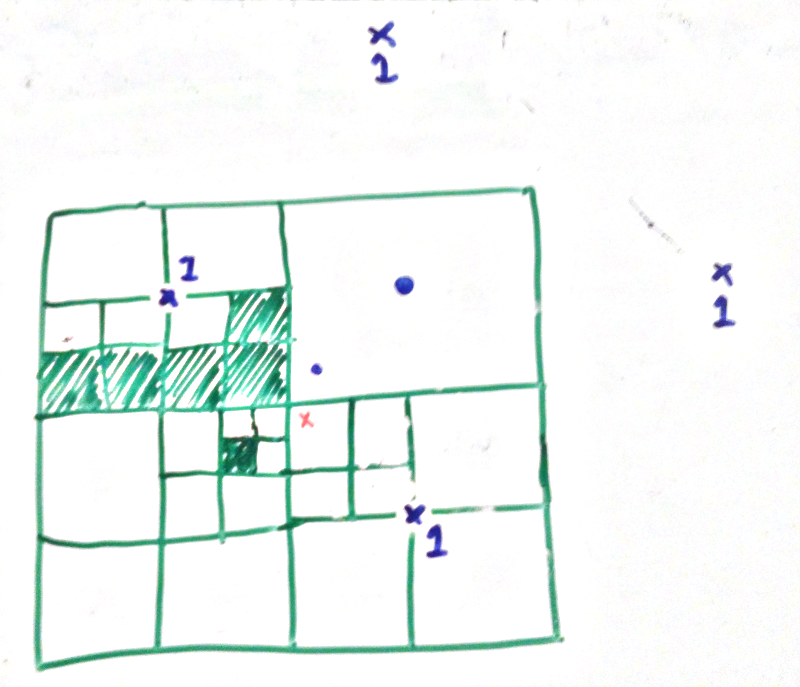
We start with our quadtree. The green colored areas are solid and the white are empty. The red cross is the starting point
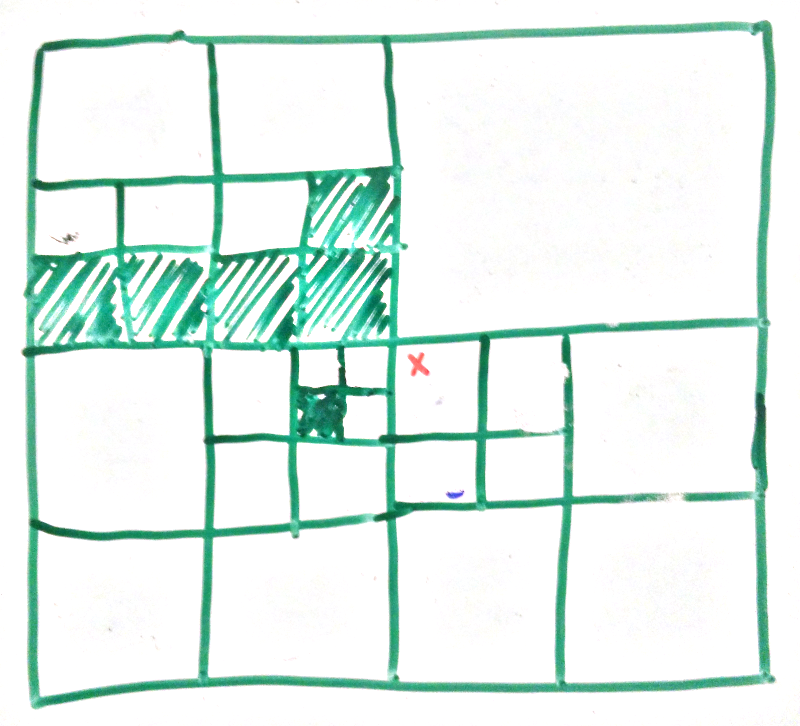
Our first step is to walk down to the deepest node containing our point. We will call the recursive function that does this WalkToPoint. We take with us:
- a list called
faces. We will explain faces soon but just know we can add things to this list and they will be processed later. - a list called
spaces. We add the empty nodes we reached to this list
When we get to the deepest node containing the point we check if it’s solid. If it is then game over the flood goes nowhere. If not then we add this node to the spaces list and then:
- starting at the center of the node pick 4 positions, one up, down, left and right from the center. The distance to the point must be the width of this node.
- add a
Faceto thefaceslist. The face contains the position, the depth of the current node (3 in our case) and the direction from that new position to this node.
So for the position we picked to the right we make a face this this:
{
   Position: Vector2(),
   Depth: 3,
   From: Left
}
We add all 4 new faces to the faces list and return;
When we get back to the function that started the first step we go into a loop doing the following:
- take a
Faceout of thefaceslist - call
WalkToFaceon thatFace - keep doing this until the
faceslist is empty. - the
spaceslist now holds all the reachable empty nodes
Clearly WalkToFace is doing the bulk of the work so lets look at how it behaves for 3 of the 4 faces we enqueued in the first function. We are only looking at 3 as they cover this different behaviours our code has to handle
For the position on the right we start by walking towards the Position in the Face just like we did for the first point, however we are keeping track of what depth we are at and as soon as our depth matches (or exceeds) the depth in the Face we change our behaviour. In this case we have reached the deepest node already so we do the same as we did for the point, namely enqueue the 4 Faces, add the node to the spaces list and return;
The point above the first is a little different as before we hit the depth in the Face we reach the deepest node. No worries, just enqueue the 4 faces like the last 2 times and return.
Also note that in this case we have points outside the quadtree, what you do with those is up to you. In TaleSpire we have divided the board up into zones and each has it’s own octree so we pass those external points off the respective zone for processing.
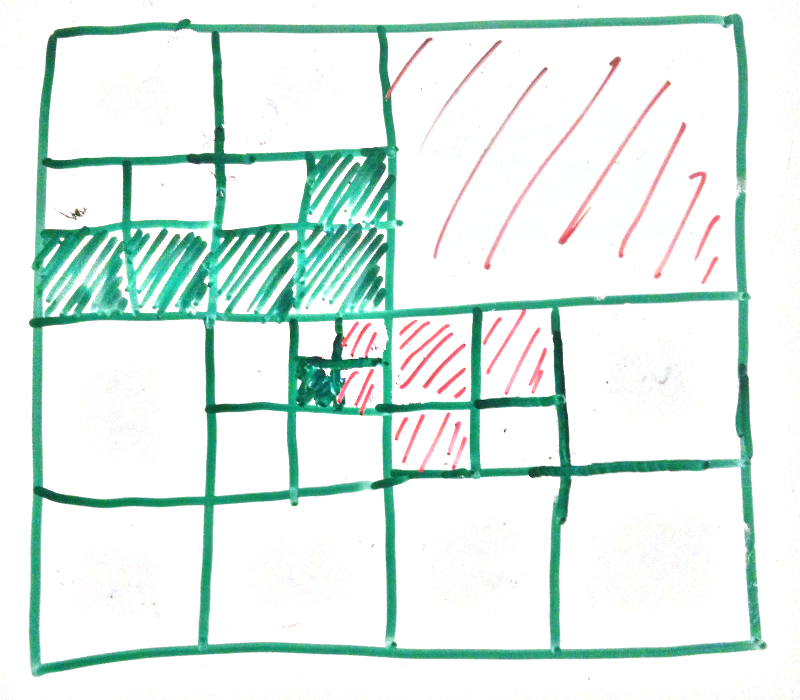
In this last case we walk to the depth specified in the Face, now we are here we still have more child nodes. This is where the From information in the Face is important. Remember that we said that once our depth >= the Face’s depth we change the behaviour. Now we stop picking nodes by the Position in Face and instead recurse into each of the child nodes on the side stated in the From field in Face. Doing this gets us to the 2 nodes marked with blue lines in the pic above.
If that isn’t clear here is a different example. Here we are coming from the right so all the rightmost nodes (marked in red) are reached.
Anyhoo if we keep following the above steps we will flood to all the nodes we can reach from the initial point. Note the you mustn’t process any node that has already been added to spaces, but other than that we are good.
Doing this in 3D simply means handling 2 more directions.
There are lots of little places the speed this up, for example:
- track when all child nodes have been added to
spacesor are solid. Then mark the parent node as processed and never process again. - you don’t need to return all the way to the initiating function to process
WalkToFacecalls. Keep track of the position in thespaceswhen you started processing a given node. Some of entries in the list after that point will be the children trying to reach other, neighboring, child nodes. - Calculate the max number of
spacesthat could we enqueued in a single walk and preallocate thespaceslist so that it doesn’t have to grow when things are added. Less frequent allocations are almost always a plus.
But that’s enough for now. Saturday I’m going to get cross zone flooding working and Sunday will be spent hooking this up to actually show and hide objects. I also need to rewrite how I capture the collision info and handle deletions. I really wanted to get this done this week so the next week can be dedicated to refactoring how characters get placed and handle computing max walk distances, but I can tell already this will need a couple more solid days of work. Ah well.
Peace folks